Flex2 Flex Forms
Phase Out
The Flex2 Flex Form will be phased out by the end of 2026 and all new forms that would typically use this form should be using the Flex2 Enhanced Flex Form.
The Flex2 Flex Form allows you to create customizable forms that can support donations, recurring memberships, sell tickets to an online or in person event like fashion shows, singing contests, virtual fundraisers, zoom gatherings, merchandise, or to set up a form with more options in a quick and easy way. Flex2 Flex Forms can be edited to match your organization’s branding or event.
When starting a new form, keep an eye out for these fun features:
- Lock/Unlocked - It is very good practice to get into the habit of locking a form once you’re finished editing it.
- LIVE Link - To view what your forms will look like on a larger screen than your Preview, utilize the LIVE link. Your LIVE link is the link you will use to share your form with the public.
- Preview Screens - The Preview screen to the right of your collapsible menus allows you to view what the form will look like in real time on a mobile device.
We like to call each section of our menu a collapsible! Every form is customized by adjusting settings and content in our collapsible menus. The 17 different collapsible sections are:
Donation Editor changes are automatically saved as you work.
Template
The default template setting is a form set on a white background. You can customize your background and settings in the Presentation Manager. It is highly recommended to utilize this feature. A Presentation Manager can be applied or removed at any time by selecting Presentation from the Type drop down menu and then selecting the Presentation Manager from the Presentations drop down menu.

Header
Your header can be personalized to match with your branding and will appear on both the Payment Page and the Thank You Page. If you have a Presentation Manager that includes a logo, you may not need this or you can use this to include an image rather than a logo.

If you have a logo image that you’d like to use, upload it in the Embedded Logo section. You will be able to view what it will look like on the right side of the screen. Recommended image size is between 800 to 1000 pixels wide by 250 to 400 pixels tall at 72 dpi. When in doubt, check with your marketing department!
The Alt Tag allows you to add a short description for your image that is accessible to screen readers or shows as text if the image doesn’t load.
The Rule option will allow you to place a straight line separating your embedded logo from your text. This can be set to “Yes” which will allow you to enter a hex code or RGB specific colors to match with your branding. If set to “No,” the line will not appear.
Color Selector
Some browsers may show an eyedropper available in the color selector. This can also be utilized to match a color in an uploaded image.
Presale
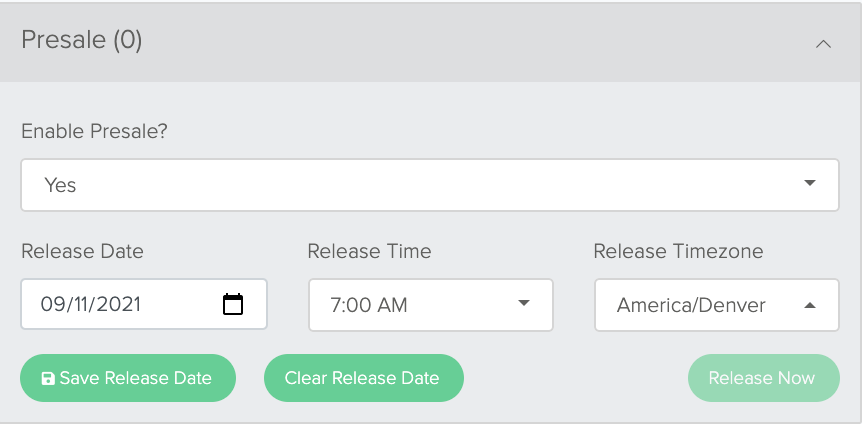
- There is also a “Clear Release Date” button which will clear your release date and time back to default settings.
- Should you wish to manually release your presale items, there is a multi-step process to confirm you wish to release these items when you click the “Release Now” button.
Once the presale items have been released by the chosen date and time or manually released, the Presale section will automatically disable itself. After that point, the form runs in On Sale mode and items can be purchased immediately via the form and will be available until the off-sale date is met or the form is archived.
Off-Sale By Date or By Count

If Enabled:
- You can choose an Off-Sale date from the Date selector. This sets the day the form will present the Off-Sale message.
- You can choose an Off-Sale time from the Time selector. This sets the time the form will present the Off-Sale message.
- You can choose an Off-Sale time zone from the Time Zone selector. This sets the time zone the form will present the Off-Sale message.

- The Current Count field cannot be edited (it is greyed out). This value is updated every time a form is processed. The Current Count is incremented by the count value set in the pricing configuration. See below.
- If a transaction is refunded, the count value of the transaction is removed from the Current Count total and will be available for sale.
- The Maximum Count field should contain the number you want to make available for sale. You can change this number at any time. If you make it lower than the Current Count, the form will go Off-Sale.
If Date or Count is chosen:

Using By Date or Count allows you to set a both a Date and a Maximum Count. Whenever either piece of criteria is met, your Off-Sale settings will be turned on for that form ensuring you get the maximum amount of time possible without having to manually monitor and adjust the form.
- Message will display a message on the form if it is accessed after your Date or Count have been reached. See below for further set up information if you choose to display a message
- Redirect allows you to redirect this form to a separate form if this form is accessed after your Date or Count have been reached. An example of this would be if your Count is set to 250 and you've reached that number, but a patron tries accessing this form after you've reached 250, this form would redirect to a donation form (or any other type of form you choose).
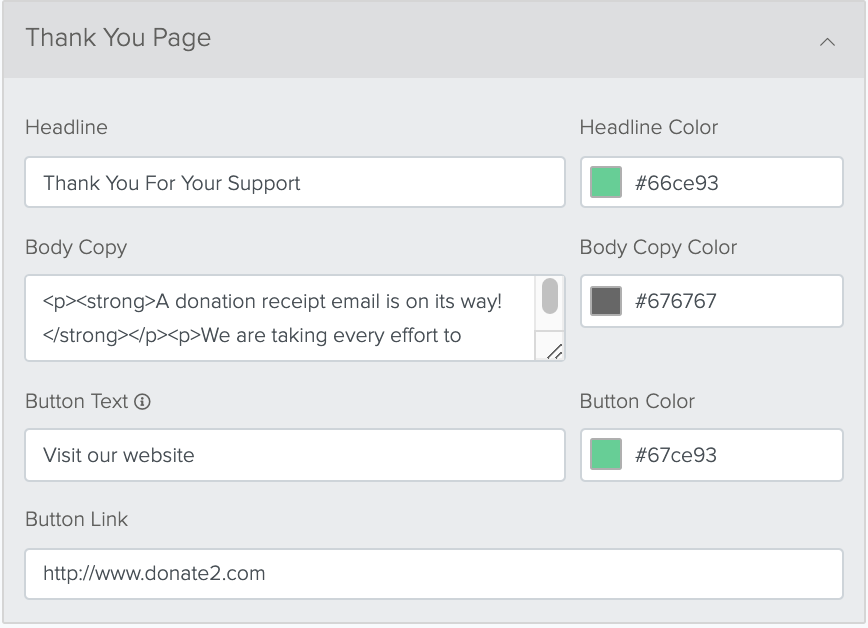
The Body Copy can be edited and may include custom CSS if you would like to apply further styles to this section.
The Body Copy Color can be edited with a hex code or RGB specific colors. This will only affect the text in the body of the form.
The Button Link allows you to add a hyperlink to your button that, should your patron click on it, will take them to a webpage. This can be your organization’s website, performance information, or whatever you choose.
Gifting
The Gifting option allows you to create a section on your form where a patron can purchase an item for themselves or gift it to another person. This option can be enabled or disabled.

If Enabled:
The Gifting number (in parentheses on the collapsible header) will show a current number of forms that have been gifted to another person. This number remains current for the life of the form. Currently, once the form is archived, there’s no way to see the number of gifts given unless the form is reactivated.
Gift Only? lets you choose whether this item can only be gifted or gives your patron the option to gift or purchase for themselves. If "Yes" is selected from the dropdown menu, only the gifting information will appear on your form in the form of text boxes for your patron to fill out with the recipient’s information. If "No" is selected, then two button options will appear on your form allowing your patron to choose whether they’d like to gift it or purchase for themselves.
The Tessitura Checkout dropdown lets you choose whether to checkout with the buyer’s email address or the gift recipient’s email address. The default is set to Buyer’s and will populate the purchase information in that patron’s Tessitura account. If you choose Gift Recipient’s Email Address, it will populate the purchase information under the recipient’s Tessitura account.
The Include Confirm Email Field can be enabled or disabled. If enabled, it provides an additional text box where your patron would re-enter the recipient’s email address for confirmation. If disabled, this text box will not appear.
The Not A Gift - Text option is an editable text field where you can change the title on the button that your patron would choose if they were purchasing this item for themselves.
The Is A Gift - Text option works the same way as your Not A Gift text box does except it changes the text for the button your patron would choose if they were to purchase this item for someone else.
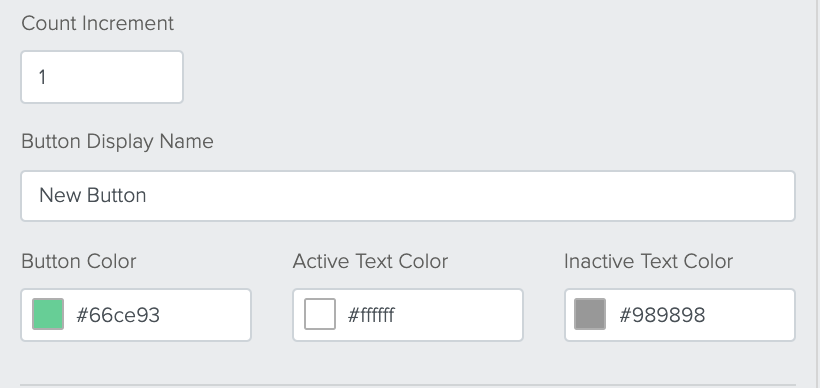
The Active - Text Color allows you to change the text color on the button that is selected. You can edit the color using a hex code or RGB numbers in accordance with your organization’s branding.
Alternatively, the Inactive - Text Color allows you to change the text color for the button that is not selected. You can edit this color with a hex code or specific RGB numbers in accordance with your branding.
Much like the text options, Active - Background Color and Inactive - Background Color can be edited to change the color of the button that is selected and the button that is not selected, respectively. Each of these options can be edited with a hex code or specific RGB colors that match your organization’s branding.
The Recipient Form Labelis an editable text box that allows you to change the gifting verbiage. Examples include, “This gift is for,” “I’d like to give the gift of holiday cheer to”, etc.
Shipping Information
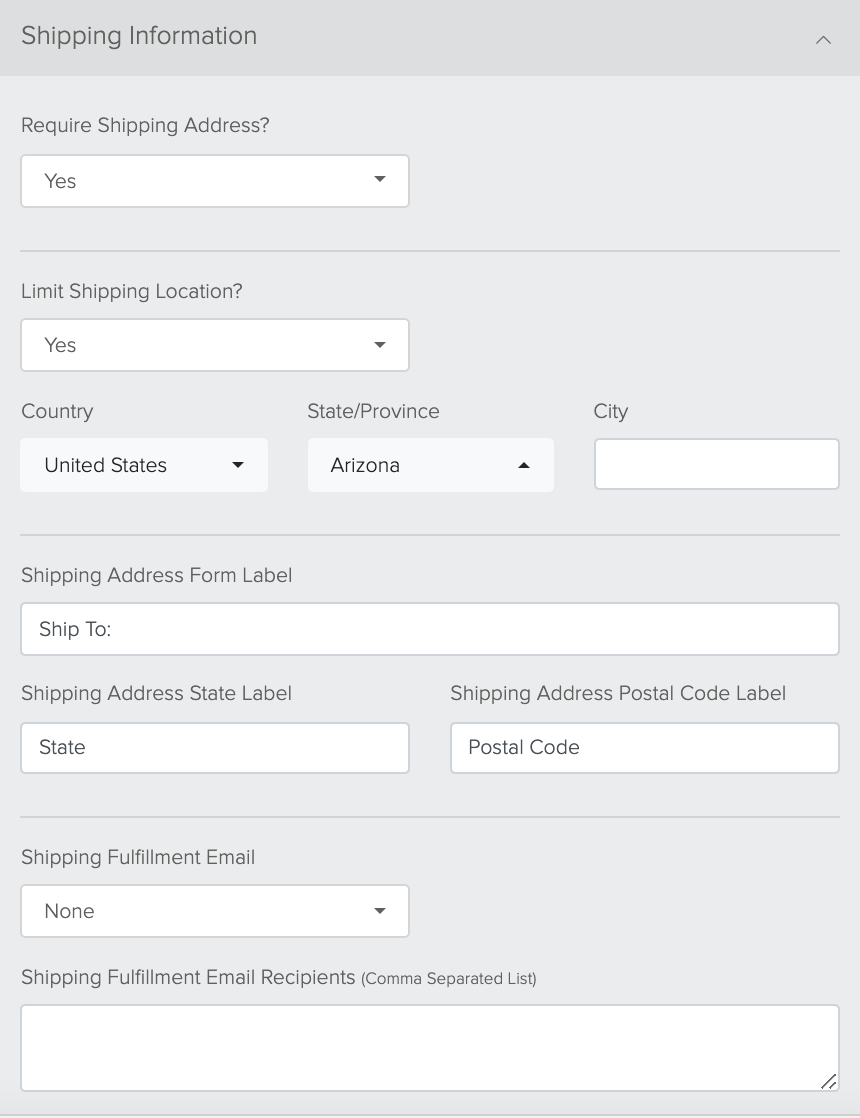
- The Country dropdown menu allows you to choose a specific country that you will ship within. Only one option can be enabled.
- The State/Province dropdown menu allows you to choose specific states or provinces within the country of your choice. This defaults to the state in which your Tessitura database is located. Only one option can be enabled.
- The City option is an editable text box if you only want to or only can ship within a specific city/cities. Should you want to ship to multiple cities, separate each city name with a comma in the text box. This will enable a dropdown menu on your form from which your patron can choose.
- An organization is doing a Valentine’s Day event where the patron can send flowers to a gift recipient or send flowers to themselves. Once payment is received via the form, an email notification is sent to the florist with the patron or gift recipient’s information and their request for flowers.
If this option is not enabled, shipping information will be placed in a CSI on the patron’s account.
Questions
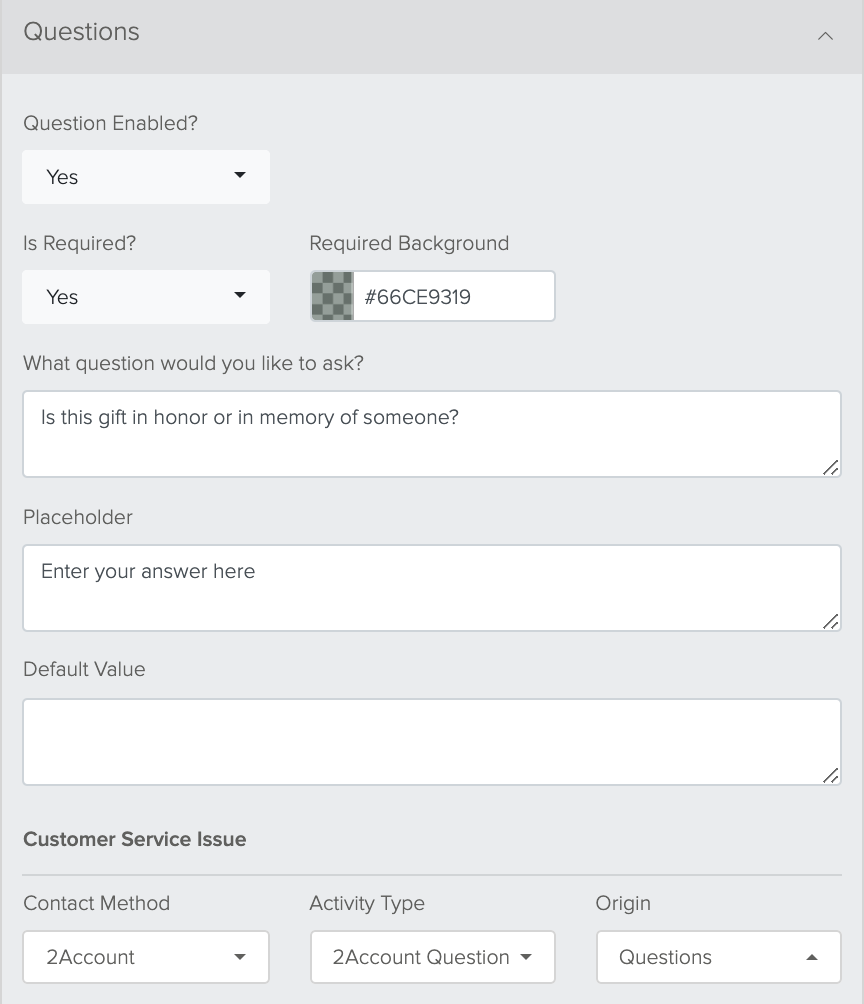
If Enabled:
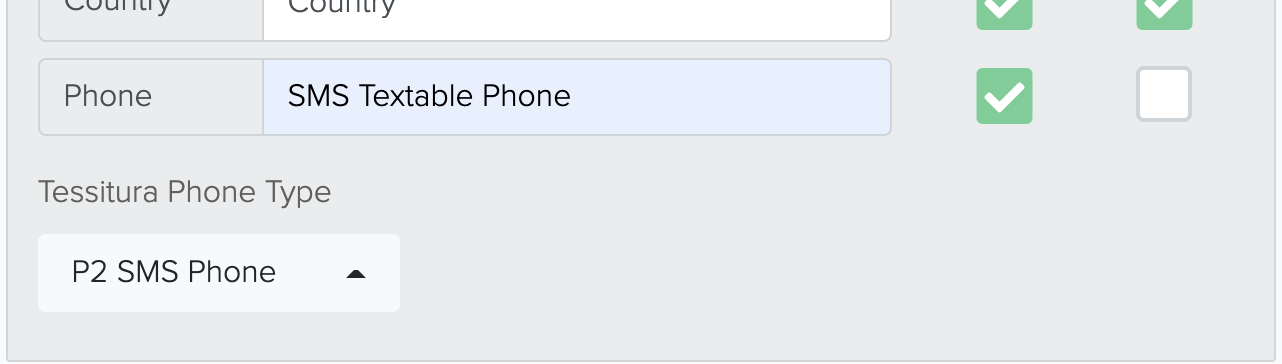
Buyer Address
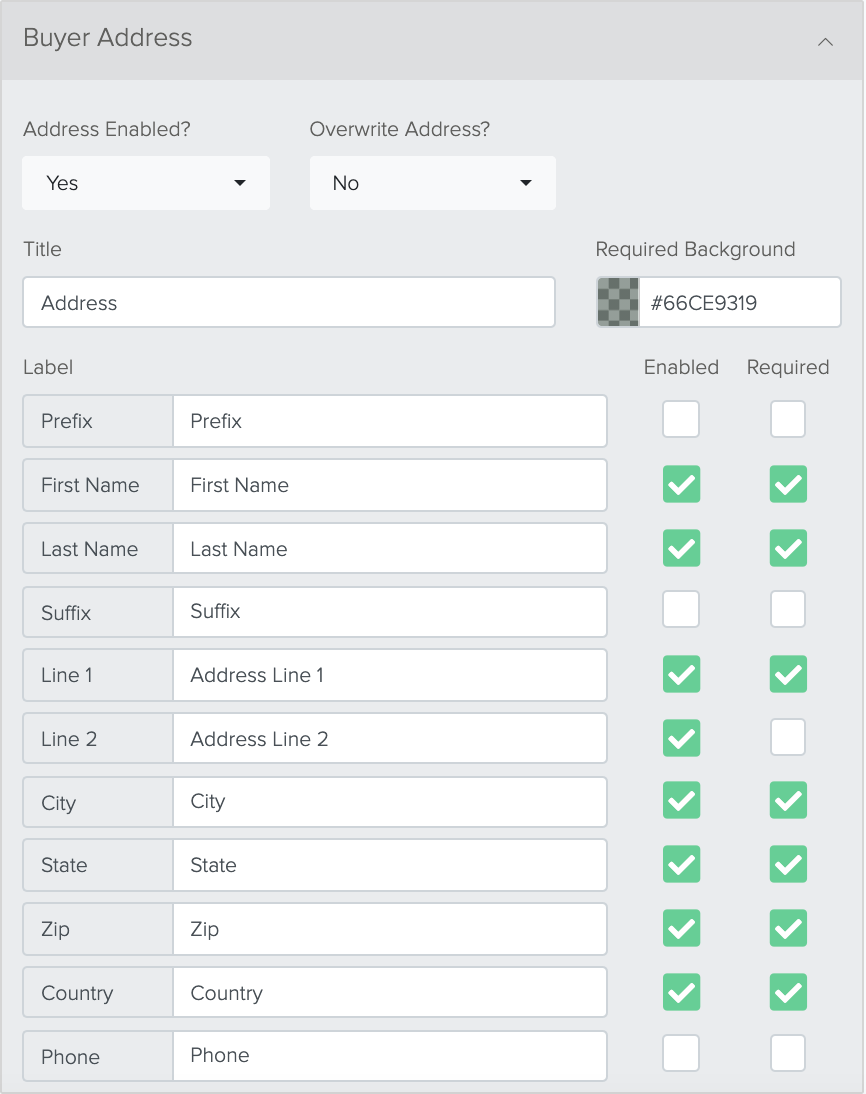
The default setting for Overwrite Address is set to "No." This means it will not overwrite an address connected to an account that matches a patron’s email address. If this is set to “Yes,” the address can be overwritten in Tessitura. Use this option carefully.
Add-On Donation
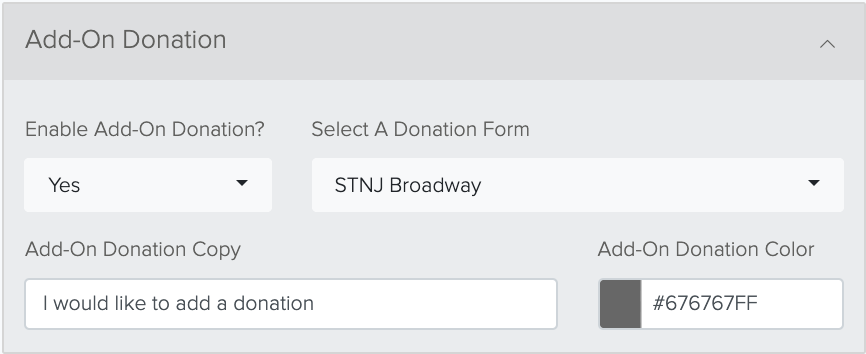
- For a Donate2 form that is utilized strictly to moderate add-on donations from your Flex form, the only options that need to be enabled on the D2 form are the Default Ask, Amount Options, Other, Behavior, and Custom Amount Options under the Payment Page collapsible and the configuration of your choice under the Tessitura Live Environments collapsible. For more information about these sections, please click here.
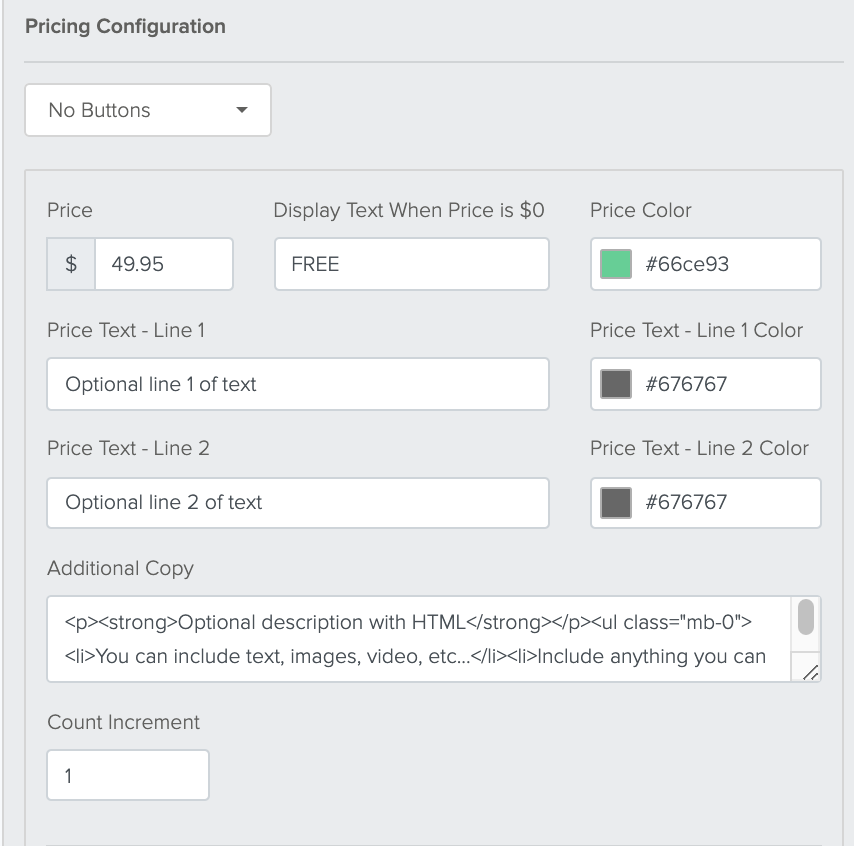
Payment Page

- Please note - Within the body of your text, there are many different CSS options you can include in this section.
- If, however, you do choose the Multiple Button option, you will have a Column drop down available next to the button type drop down. This allows you to choose from 1, 2, or 3 column options that you will be able to preview in the preview screen on the right. See below.

- If the price is set to zero (i.e. the event is free), the Display Text when Price is $0 will automatically display. This text is also editable within its text box.
- If your form is created with multiple buttons, you have the option to change the Count Increment in each button configuration.
- For additional information, please review the Off Sale By Date section above.
Be aware that if constituencies are configured in the Payment Page, those settings will override the settings under the Tessitura Constituencies collapsible. Please review the Tessitura Constituencies section below for further information.
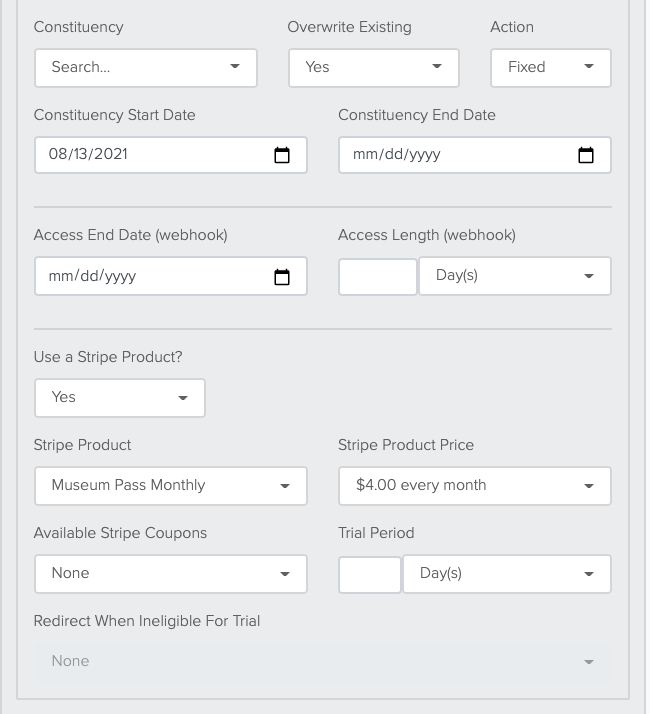
- Fixed - This allows you to set a fixed date range from which your patron will be able to access whatever item it is you’re selling (i.e. if it’s a season subscription, the related constituency will be active during the date ranges of your season, or whatever time frame you choose). Fixed gives you a fixed start and end date that you or your organization can choose.
- Rolling - This allows you to set a certain amount of time from the date of purchase. Whereas the Fixed option gives you a range of time and if a patron purchases the item in the middle of that time frame, they will only have access until the end date, Rolling gives you the option to allow your patron access to your item for a given amount of time from the date of purchase. This can be set for days, weeks, months, or even years!
I f enabled:
- You will be able to select a specific Stripe product from the Stripe Product dropdown menu.
- Based on your selection, the Stripe Product Price dropdown menu will have options to choose from. Choose the correct price that matches the Stripe product of your choosing.
- You will be able to select Available Stripe Coupons via the dropdown menu. If none are available, the default is set to None.
- The Trial Period allows you to set a certain amount of time for a trail. The text box is editable to however many days you choose and you are able to choose Days, Weeks, Months, and Years from the dropdown menu next to the text box. When this section is active, it automatically disables the Available Stripe Coupons.
- When the Trial Period option is enabled, an additional drop down menu appears below titled Redirect When Ineligible for Trial. This option allows you to redirect the patron to a chosen form from the drop down menu where they will be able to purchase the item. This option reads the email address attached to the purchase to discern whether the owner of that email will be eligible for a trial period.
If the Stripe Product option is disabled, Recurring Frequency and Promo Codes appears instead.
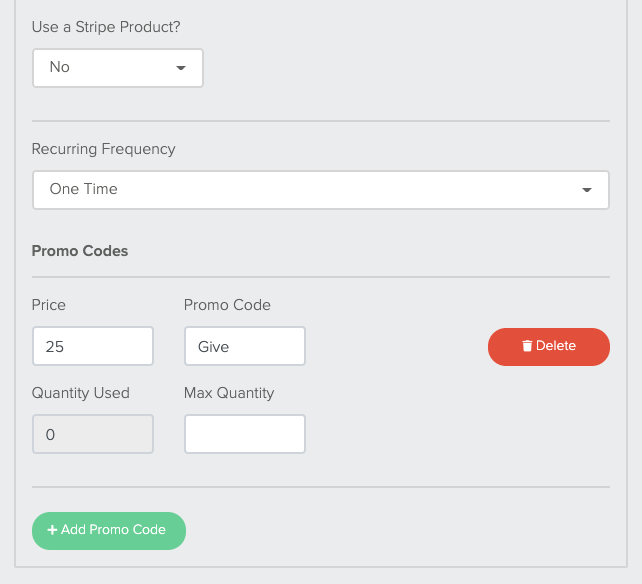
Recurring Frequency allows you to select how often the patron’s card is charged. For example, if the item on sale is a subscription package, you may want to select Monthly instead of One Time. Only one option is available to select via the dropdown menu.
- If your promo code is enabled, a text box will appear on your form for your patron to type in the code you give them. If your promo code is disabled, no text box will appear on your form.
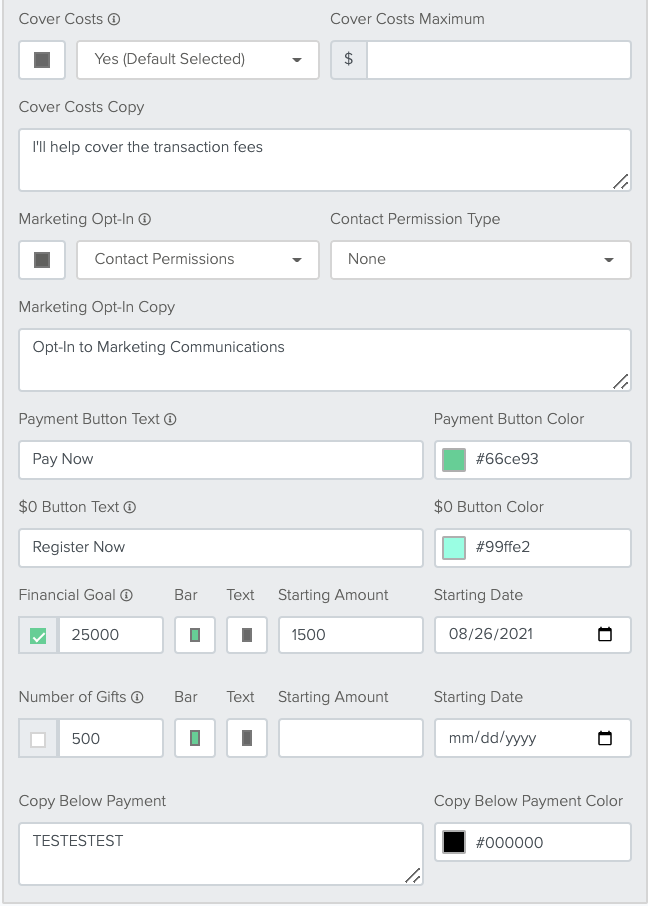
- "Yes" places a checkbox on the form giving the patron the option to cover the costs. They must select the checkbox if they want to cover costs.
- "Yes (Default Selected)" places a pre-selected checkbox on the form where the patron must unselect the checkbox to opt-out of covering the costs;
- "No" will remove the check box from the form completely.
- If your Donate2 account is integrated with Prospect2, this option will be available via the dropdown menu and settings can be adjusted in the Prospect2 integration.
- If you are not integrated with Prospect2, you should only have the option of "Contact Permissions." which will add this information to the patron’s Tessitura account.
- Utilize the "None" option if you do not want the Marketing Opt-In checkbox available on your form.
- If your goal is to receive a certain amount in gifts, you can utilize this option (the goal number can be edited). The Bar and Text colors can be edited based on your branding; however, this is one of the only spots where entering a hex code is not an option.
- If you are generating donations outside of your Donate2 Donation Form (via the phone, website, checks, etc.) you can use the Starting Amount and Starting Date to account for additional sources of donations. Once you know the current amount raised (after pulling a report in Tessitura), you can enter that amount into the Starting Amount field. You can then set the Starting Date to the day from which your Donate2 donations will count towards this campaign. Most likely, that will be the day you update the Starting Amount.
- If your goal is to receive a certain number of gifts, you can utilize this option (the number can be edited). The Bar and Text colors can be edited based on your branding; however, this is one of the only spots where entering a hex code is not an option.
- If you are generating donations outside of your Donate2 Donation Form (via the phone, website, checks, etc.) you can use the Starting Amount and Starting Date to account for additional sources of donations. Once you know the current amount raised (after pulling a report in Tessitura), you can enter that amount into the Starting Amount field. You can then set the Starting Date to the day from which your Donate2 donations will count towards this campaign. Most likely, that will be the day you update the Starting Amount.
If this form is created and utilized for a ticketed event, Cover Costs is not an option. Cover Costs becomes an option if this form is created to accept donations or has the Add On Donation option enabled.
Thank You Page
Gift Certificate Redemption
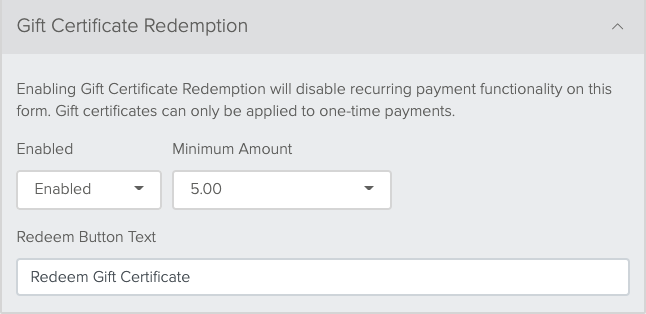
- This feature is not available with payments labeled as recurring. When enabled, it will automatically disable the recurring payment feature.
- When this feature is enabled, it will automatically disable the Use Stripe Product option.
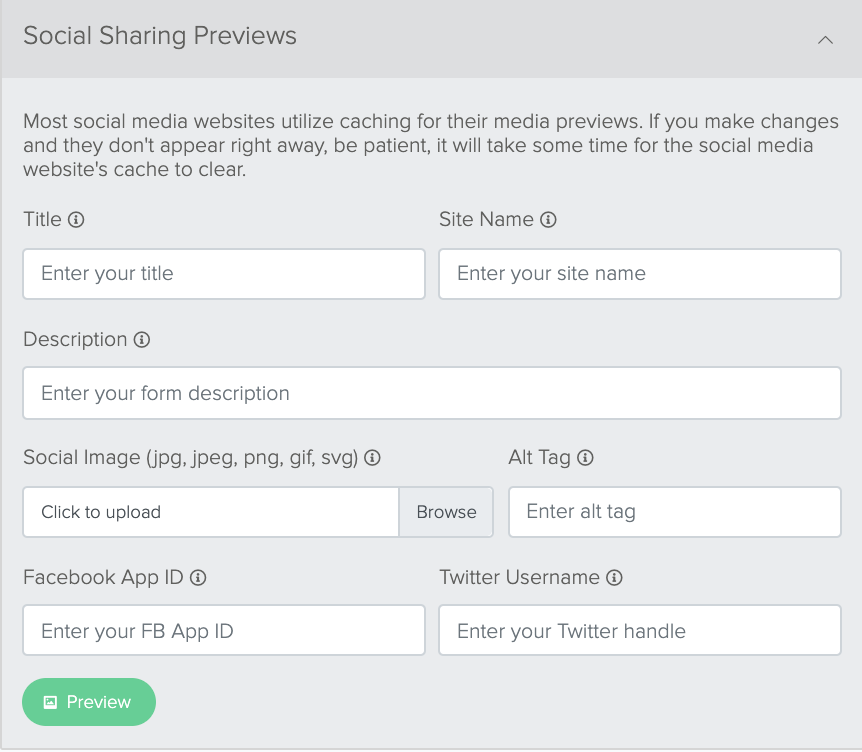
Social Sharing Previews
Tessitura
These options are based on information from your Tessitura Integration.

The Fund(s), On Account Method(s), Source, Channel, Receipt are all available via the drop down menus in each section. These options are what is active and available in your Tessitura database. The Fund, On Account, and Receipt options can be configured; for more information, click here.
Multiple Funds and On Account Methods can be selected in this section and a drop down menu will appear on your form for your patron to choose where they would like their gift to go (i.e. you can have options for the General Fund, Education, and Young Artist Program, and your patron will be able to select one of these from the drop down menu in your form). If only one Fund or On Account is configured, no options will be viewable by your patron on the form.
The Source is a searchable function that connects to your Tessitura database which allows you to type in the title of a specific source you’d like attributed to this form. You will need to type in at least three characters in the search field before any options appear. The Channel option is also a searchable function that connects to your Tessitura database. Almost always, you will want to select Donate2; however, you can create a separate channel for Stream2 or Flex2 forms. The Receipt option is the final searchable function connected to your Tessitura database. If you choose to do so, you can create a specific receipt in the HTML editor of Tessitura that can be assigned to this form. You do not need to have a receipt available from Tessitura. You have the option of creating a more customized receipt email in your Message Manager.Tessitura Constituencies
Be aware that if constituencies are configured in the Payment Page, those settings will override the settings under the Tessitura Constituencies collapsible.
 If no constituencies are configured in the Payment Page settings:
The Constituency is a searchable function based on the available constituencies in your Tessitura database. Remember, to search, you will need to enter at least three characters in the search bar before any options become available.
Overwrite Existing can be enabled or disabled. If it is enabled, it will update the constituency in the patron’s Tessitura profile.
The Action drop down has two options available to you:
- Fixed - This allows you to set a fixed date range from which your patron will be able to access whatever item it is you’re selling (i.e. if it’s a season subscription, the related constituency will be active during the date ranges of your season, or whatever time frame you choose).
- Rolling - This allows you to set a certain amount of time from the date of purchase. Whereas the Fixed option gives you a range of time and if a patron purchases the item in the middle of that time frame, they will only have access until the end date, Rolling gives you the option to allow your patron access to your item for a given amount of time from the date of purchase. This can be set for days, weeks, months, or even years!
Webhook Destination
Webhook Destinations allow you to pass information from your system to a third party platform. This feature is not commonly used; however, if you would like to utilize it, please read more here.

Messaging
This is used in a similar way to the Messaging option for a Donate2 form; however, in the Flex2 environment, it's much more detailed and where you can create multiple different messages in your Message Manager for each section of this dropdown option.

There are three different configurations available with Messaging and it’s up to you how you wish to mix and match (if you choose to!):
- Onsale - The onsale section (numbers 1-6) denote messaging that goes out when an item is Onsale and purchased.
- Presale - The presale section (numbers 7-12) denote messaging that goes out when a presale item is purchased. If your presale mode is enabled above, your Message Manager options will be greyed out and inaccessible. Should you need to make changes, briefly disable Presale mode, make your necessary changes, and enable Presale mode again.
- Tessitura Account Created - These sections (numbers 13 and 14) denote messaging that goes out when a Tessitura account has been created, either for the gift recipient or the buyer.